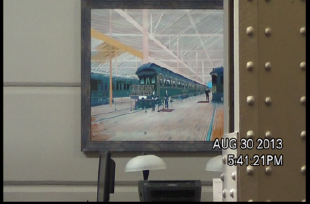
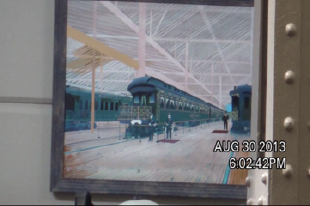
PI HD Video/Timestamp Tutorial
This is just a tutorial written in good will and is for information purposes only. You must read and comprehend the entire tutorial. More importantly, no results are guaranteed! Results achieved from following this tutorial may vary significantly. It is the reader’s responsibility to know what system works with what software. In no way is this tutorial guaranteeing results, desired results, or instructing individuals to act or behave in a certain manner. Lastly, two Sony HD camcorders (HDR-CX380/B and the HDR-CX190) were used in the creation of the 1080p HD video
HD camcorders have been around for several years now, however, harnessing the HD quality from the video is another story. Over the last few years, and even more so presently, I have noticed a lot of industry professionals utilize HD Camcorders.
Most of the time, the individuals are not getting the best quality out their camcorders because they are reverting to Standard Definition such as 480i maximum by using software such as Pinnacle, which requires the use of A/V cables. A/V cables, for the most part, result in downgraded video (if originally recorded in 720p, 1080i, or 1080p).
Also, many professionals will purchase an HD camcorder, but then change the settings within the camcorders software to Standard Definition. There appears to be two reasons this is done. The first reason I have noticed, is because they advertise, or want to advertise, that they “have or utilize HD Video”. This is a partial truth. The second reason I have noticed, many people realize once they purchase an HD camcorder that they cannot process the video properly. By using an HD Camcorder on maximum 1080p or 1080i settings, but then running the video through Pinnacle and/or a computer that does even have the minimum requirements necessary to process the HD video could easily, and often does, distort or degrade the video. The professional then realizes that the video quality has been degraded and therefore decides to change the High Definition setting on the camcorder to Standard Definition to avoid the distorted or degraded video.
The following tutorial should appeal to professionals who are already running HD Video, however, using AVS for time stamp AND individuals wishing to upgrade their video quality or utilize the HD settings in their HD camcorders. If you utilized Pinnacle in the past, the process in the following tutorial is very similar, if not easier and more simplistic than Pinnacle. The timestamp will appear on your laptop screen if it appears on your camcorder screen and thereby will be recorded. If your camcorder does not display the time and date stamp as a specific function of the camcorder, then it will not display on the recording device/software (similar to what Pinnacle does).
Minimum PC Requirements
We will start here because it is imperative to assess PRIOR TO making any purchases. If your PC does not specifically have these features, then I would strongly discourage attempting to process or utilize any video above 480i. Also, these are minimum requirements so going above these requirements will most likely enhance stability and fluidity of film.
Windows:
*Windows 7/Windows 8/or later (If you use/purchase Windows 8 you may want to install Class Shell).
* 2.0 GHz (or Higher) dual core CPU, or 2.0 GHz (or Higher) multi-core i3, i5, or i7 CPU
– A bad idea to try this with a single core. Multiple cores (two or more) are needed.
*4GB Total Installed Ram (8GB/16GB or higher is encouraged)
*Built In USB 2.0
MAC:
*OSX 10.7, 10.8 or later
* 2.0 GHz (or Higher) dual core CPU, or 2.0 GHz (or Higher) multi-core i3, i5, or i7 CPU
– A bad idea to try this with a single core. Multiple cores (two or more) are needed.
*4GB Total Installed Ram (8GB/16GB or higher is encouraged)
*Built In USB 2.0
**Keep in mind that when you are running video of any kind, the fewer programs you have open during the process the better the video will turn out. A person only has two hands, just like a computer only has X processing power/ability. If you tie a person’s hand behind their back, they will most likely be less apt at catching, say, a baseball. A computer with multiple programs open at once, ties up resources that could be entirely focused on the task at hand (HD Video). Don’t tie up your PC.
A Working Setup
A computer presently used to achieve this is a Lenovo IdeaPad Y510P laptop. Several systems achieve this and similar specs can be achieved more cheaply with a desktop PC. As for the Y510P, there are several different Y510P’s (spec wise) that range greatly in price, however, this system specs include:
Core Requirements:
*Windows 8 (I installed Classic Shell – Windows 7 Version)
*Intel Core i7-4700MQ 2.4 GHz (6mb Cache)
*16GB DDR3 SDRAM Maximum Installed Ram (8GB/16GB or higher is encouraged)
*1 USB 2.0 Port and 2 USB 3.0 Ports
Other Specs That Help (Included, but not limited to):
*1000 GB (AKA 1 TB) 5400 RPM Hard Drive, 24 GB Solid State Drive
The large hard drive will be necessary since you are dealing with larger file sizes due to the increased graphics of the videos. A 5400 RPM is acceptable; however, faster hard drives are available. The 24 GB Solid State Drive (upgradable) allows the system to run faster by allocating more resources to flash memory, thereby permitting the hard drive to work separately or independently from the solid state drive.
*NVIDIA GeForce GT750M (SLI) with 2GB Dedicated DDR5 VRAM
Generally, the better the graphics card the better the graphics and allows for dedicated memory specifically for the graphics. SLI technology allows for a faster frame rate performance.
*Blu Ray RW Drive
This is somewhat “future proofing” an investment. The standard DVD (most commonly) holds only 4.7 GB of memory (single-sided, single-layer), however, 8.5-8.7 GB (single-sided, double-layer) and 9.4GB (double-sided, single layer) are possible. Blu Ray discs can hold memory ranging from 25GB (single-layer), 50GB (dual-layer), and 100GB (BDXL). The only problem here is the companies we deal with on a daily basis have not changed from CD/DVD format yet.If they do, this could be future proofing your PC investment to have a re-writable
Blu Ray drive. The other option would be to purchase USB thumb drives and format them to exFAT. You can also segment the video; however, we prefer to avoid doing this.
*Cloud-Based Antivirus Software (ESET NOD 32)
While there are a few reputable cloud-based antivirus software companies, ESET NOD is suggested here. Cloud-based antivirus software “runs in the background” and for the most part will remain “quiet”. Many of the larger Antivirus software companies require installation on your PC and that can diminish your processing power and/or hinder your ability to process HD video. To put this simply, this is because the installed software requires more of your PCs attention to run. Despite being a solution to consider, ESET can also slow down your computers processing power, however, you have the ability to turn it to “game mode”, which may also help.
If you have made it this far, then you should have the minimum PC requirements or you are considering your options. Either way, from this point forward — we will be getting our hands dirty.
HD Camcorders
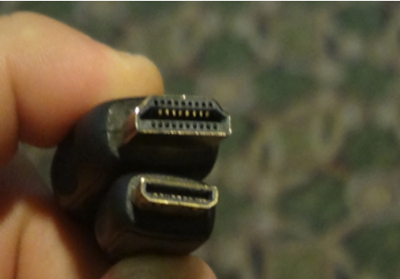
Please note, the software and capture device so far works in accordance with two model camcorders that have been personally tested, however, if your HD camcorder has an HDMI output (then it should, in theory, work). The camcorders that have been tested are: The Sony HDR-CX380/B and the Sony HDR-CX190. These two camcorders have HDMI outputs located on the side of them. You will need the correct HDMI output connection (Micro HDMI, Mini HDMI, etc) that fits your specific camcorder. The input end of the HDMI cord will be standard looking HDMI connection (such as on your TV). As you can see, the two camcorders have two different output connections despite being the same model.
Our Industry, Video Game Industry, HD DVR Industry
What do these three industries have in common? They are all industries that have a demand for recording of HD Quality video and portraying those recorded images just as they were on that screen for that particular instance in time. For example, we want our video to be recorded, with a time stamp, as it appears on our camcorders. The video game industry likely prefers to have their recorded video appear as it does on their televisions, just as the HD DVR industry prefers to record those HD channels for its consumers. Regardless of industry, innovation can always be borrowed from other industries.
Why would/should I care at these industries? These are just two other industries, amongst many, we can look to for HD video tips or innovations. This is in large part because both industries are being pushed for bigger and better graphics as well as the ability to record those graphics. With HDTV’s and HD channels on the rise, the HD DVR’s are becoming more commonplace just as with higher resolution PCs, video game consoles, and the like, there is a population of individuals who wish to record their game play. Nevertheless, these two industries could both provide simplistic ways of recording HD video, from an HD camcorder, for our industries.
Why mention these industries? The reason for mentioning these industries is that others may wish to try or experiment with other products and maybe this will lead to more “outside the box thinking” One person can test a limited supply of products, while many persons can test an unlimited supply. It is only my hope that those results, good or bad, are shared with others.
Hauppage HD PVR and Other HD DVR’s
These have not been personally tested; however, I believe they could possibly be used to also record/view what is being viewed on the camcorder, which would give them the ability to record a time stamp so long as your camcorder can display it. The idea is that if a television can display it at 720p and up (to 1080p), and that HD video can be recorded by a DVR, then it should follow that the device can record HD video from a camcorder either directly (HD Camcorder Output to HD (P) DVR), or through the television (HD Camcorder Output to HDTV with recording of HDTV). Again, I have not tested the idea, but do not see why it cannot work.
Elgato Game Capture HD
If you have read this far, drum roll please — this is the tested device that will function similar to your Pinnacle. The device ranges in price from $100 to $200. The device requires a higher end PC. This small device allowed the two tested camcorders (Sony HDR-CX380/B and the Sony HDR-CX190) to display with the provided software (download available at www. http://www.elgato.com/gaming/game-capture-hd/support/update). The software is relatively simplistic and allows for the basic functions necessary to process the HD video (clip, render, edit, even take a still image).
How to Set Up the Hardware:
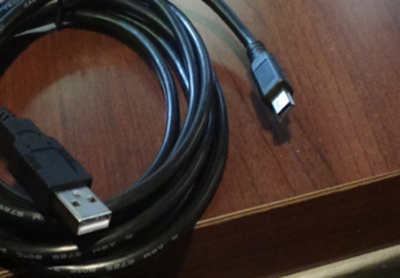
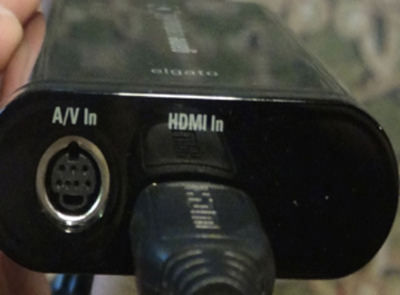
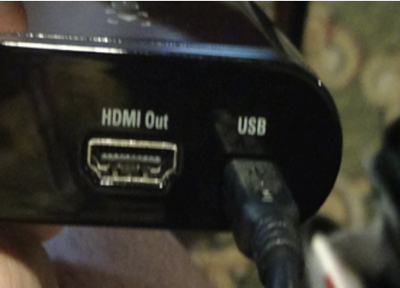
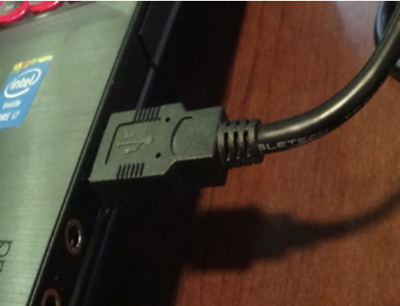
The box comes with an HDMI cord with standard HDMI ends, a USB cord, the Elgato Capture Device, other cords related to a PlayStation 3 or Xbox 360, and the instruction card. For our purposes, we will only need the Elgato Capture Device and the USB cord (for OUTPUT) from the Elgato Device. In addition to the Elgato Device and the USB cord, you will also need is an HDMI cord that permits your camcorder to “talk to” the Elgato Capture Device. This HDMI cord may or may not be included with your camcorder accessories. You will not be using the HDMI OUPUT on the Elgato Capture Device.
The HDMI from your camcorder will be INPUT into the Elgato Device, while the USB port will run from the opposite (OUTPUT) end into your PC. You should utilize your best USB ports on PC. If you have a USB 1.0, 2.0, or 3.0, always opt for the higher USB port as the higher the port, the faster the processing. Realistically, you should not be using USB 1.0.
The instruction manual does not cover our intended use of the product, although, the software does indicate/imply “Ipad’s, I-phone’s, and other devices” can be used in conjunction with the software. The instruction manual also provides the link to location where the software can be downloaded.
Now, open the software and hook everything up. If the software does NOT recognize your camcorder, then some settings need to be changed within the software. See below section “How to Setup the Elgato Device”.
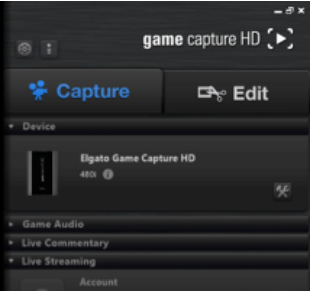
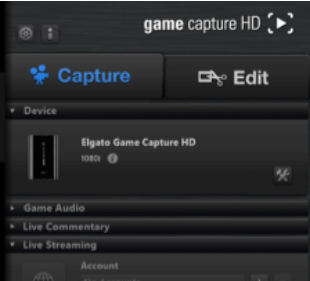
Also, look at the resolution (480i, 720p, 1080i, 1080p). If the resolution is less than 720p, such as 480i, it is not HD. Do not panic because some camcorders have varying resolution settings. Both Sony’s used with this software, have the option to use Standard Definition (480i) and High Definition (up to 1080p) within the camcorders software. I noted my older model Panasonic HC-V100M allows you to change from Standard to High Definition. So you may need to adjust the settings within your camcorder. One thing I love about this software is that it automatically detects what Definition or “Signal” you are using.
How to Set Up the Camcorder
Open your camcorder and go to the settings.
1.) From here you will go to
- – Image Quality/Size (Sony) or HDMI Resolution (Panasonic)
i. For Sony, Change from STD Quality to HD Quality (Sony)
ii. For Panasonic, Change HD Resolution and Component Output to 1080i
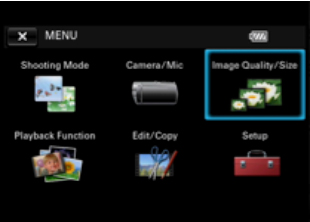
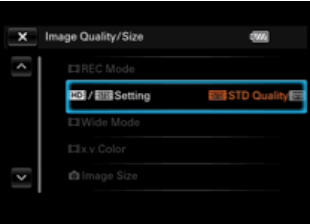
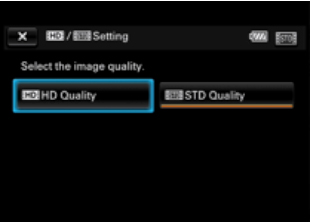
(Sony Pictured Here)
How to Setup the Elgato Device
First, you must download the software from http://www.elgato.com/gaming/game-capture-hd/support/update
Then, in order to get the software to recognize your camcorder, you must
1.) Click on the “Capture” Tab
2.) Now open the “Device” Tab
- It should say, Elgato Capture HD “No Signal”
3.) Click on the “Tools Symbol”, which should look like this 
You should be at the Game Capture HD Settings (particularly the “Capture” tab)
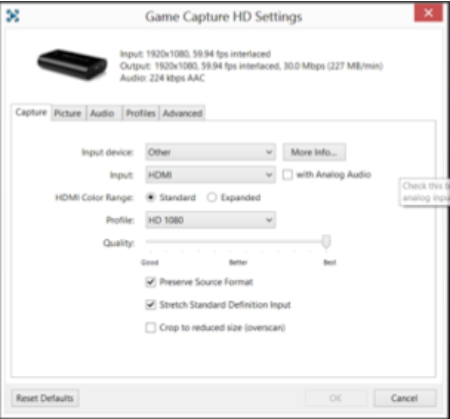
1.) You want to have “Input Device” as “Other”
- Take note of the many other recognizable devices.
2.) You want to have “Input” as “HDMI”
- Take note that you can use other inputs (including Standard A/V)
3.) HDMI Color Range was set to “Standard”
4.) Profile was set to “HD 1080”
5.) Quality was ranged to “Best”
The Tabs: Picture, Audio, Profiles, and Advanced were left at DEFAULT (not changed).
Once those settings have changed, the Elgato Capture Device should recognize your camcorder. This has been tested with the Sony HDR CX190, Sony HDR CX380/B, and a Panasonic HC V100M. All were recognized, but even more impressively the signals (480i, 1080i, etc.) were recognized. For instance, if you were to change the settings from HD Quality (1080i, 720p) to Standard Definition (480i) while plugged into the Elgato Capture Device, the device was able to change the signal to accommodate for the quality just by being plugged in (see screenshots below).
Setup Complete, Now How to Use the Software
So you have all your equipment connected and your camcorder is showing up at the Capture Screen. If you require no sound to be recorded, then adjust all sound settings to the lowest possible to ensure no sound is recorded. Make sure the video, in the top right corner, is recording at the HD “Signal” that you want (480i, 1080i, etc.). If you intend on running High Definition, close all programs you do not need open. Now we simply need to CAPTURE the video.
Capturing:
1.) Press the big red button at the bottom left of the Elgato Software that says “Start Recording”
2.) Press play on your camcorder with ONLY the time and date stamp displaying.
- If you have other images displaying then you need to adjust your camcorder settings.
3.) Let it record.
- There is a slight delay between what your camera is showing and what is running in the Elgato Device.
4.) Once it is done recording.
Editing:
It becomes tricky here so pay attention!
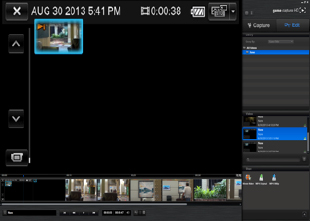
5.) You can view your film in the timeline located along the bottom.
- You can get precise at starting/ending the film in capture mode to avoid editing.
6.) Do not just CUT video. To properly edit the beginning of the film and the end of the film (in case there is unwanted footage); you will need to move the cursor bar along the timeline to the point you want your film to start.
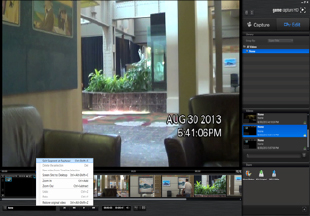
7.) Right Click on the cursor bar once the timeline is where the film starts. A menu will pop up as it appears in the picture below. SELECT “Split Segment at Playhead”.
8.) Now repeat the process for the end of the film (to trim the end of the film if necessary)
- You now have 3 sections (Trimmed Start, Desired Footage, Trimmed End)
9.) Now select the Desired Footage. It should turn blue, while your Split Segments are NOT highlighted in blue.
10.) Now Right Click on the Desired Footage (AKA blue highlighted section) and click on “New Video From Timeline Section”. This will create a new video along the right hand side with ONLY the highlighted video.
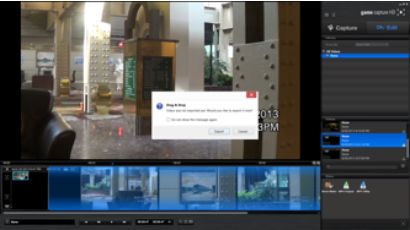
11.) Finally, along the right hand side will be your new video. You can find it under “Videos” and it should be the video on the bottom of the list. Right click and hold the button down to DRAG the video to the middle of the Elgato Screen where the images appear. A pop-up menu appears and it says “Drag and Drop”. It asks if you would like to Export. Click Export.
Make sure you note where the video saves. It should save in your “Library”, under “Videos”, however, you can select where you want the file to save in the settings.
Take a Timestamp Still Photo
1.) Simply click on the Camera Button at the bottom of the Edit screen.

2.) Be sure to note where the photos are being saved, or set the location of where to save the photos.
To Check the Video Quality of the Film from the Saved Spot:
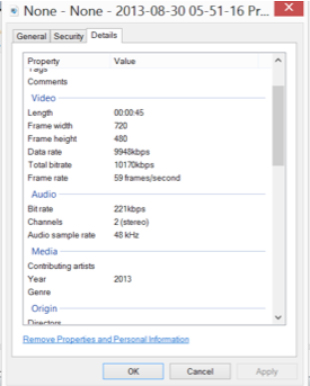
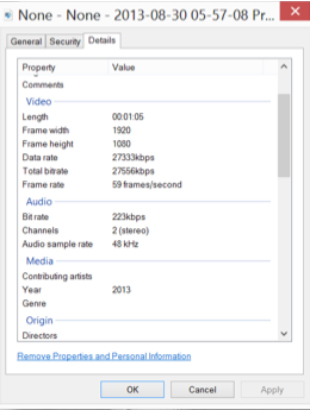
Right click on the film then go to Properties, Details, and then look at Frame Width and Frame Height. To put it very simply, the Frame Height will be the designation. If it says 480 then it is 480i, if it says 1080 it will be 1080i or 1080p.
Still Images Taken From Video
Digital Evidence and Preservation of Metadata
Some individuals might argue, similar to Pinnacle, that using such recordings will strip the metadata from the camcorder. The answer is, yes it will. It is up to you to determine whether or not you and/or your company prefer to backup the metadata AND record the video. I do not live in your state and therefore your laws may differ. In most instances, it is better to be safe than sorry and preserving metadata is your responsibility.
Important Side Notes
The two Sony Camcorder’s used for this process both had different HDMI OUTPUTS and the models were virtually a year apart. The CX190 required a mini HDMI for the OUTPUT, while the CX380/B required a micro HDMI for the output.
If your PC has an HDMI port, that HDMI port is OUTPUT ONLY. I have not seen an HDMI INPUT on a PC, although for us, that would be a huge benefit. Thus, do not stick an HDMI cord directly into your computer, it is EXIT ONLY! The HDMI output on laptops are for running OUT of your laptop and IN to your HDTV etc.
While the highest output on camcorder is 1080i, the software will appears to scale to 1080p, if you so desire.
Pitfalls/Problems of HD Video:
* HD Sees Everything. That vehicle window you thought was clean will be recognizably dirtier. That bird that just flew by just created a noticeable window block.
* Enormous File Sizes. Prices of USB drives have fallen significantly though. Think about purchasing thumb drives to alleviate this headache. Also, a blue ray drive may future-proof your investment.
* Long Uploads/Downloads. Because of the file sizes, the video may take very long to send, create video links out of, and process. Thus, thumb drives with a USB 3.0 port may be a better choice to move the files.
* Watch that Film. Because of the demanding PC requirements, even the fastest computers may struggle to process full HD (1080p) video. If you notice glitches or frame rate loss, you need to reassess your circumstance.
*Uses MP4 format. Make sure to turn all of the sound settings down when you are capturing.

